[Top] [Prev] [Next] [Bottom]
Script-Fu; description and function
In this chapter will we take a peek at what's under the Xtns/Script-Fu menu in the Toolbox.
Script Fu
Script Fu is what the Windoze world would call a "macro". But Script Fu is more powerful. Script Fu is an interpreting language based on scheem with querying functions to the gimp "data base". You can do all kinds of things with Script Fu. What an ordinary Gimp user will use it for is to automate things that he/she wants to do frequently, or/and is really complicated to do, and hard to remember.
In this chapter will we take a look at the independent Script Fu:s that come with Gimp. Script Fu can also be found under the root file menu. The script fu:s under the root file menu will be described in chapter X because they behave more like plug-ins, or macro filters if you look at it in a Photoshop way.
In the main Script-Fu menu you will you find Console, Server, Refresh and some submenus. We will discuss Console and Server in chapter X. Refresh is used if you have made or downloaded a new script fu and want to use it right away. Copy or move your new script to .gimp/scripts and make a refresh. It will now appear in one of your menus. If you don't find it, it may be under the root file menu filters. If you don't see it at all, something was wrong with the script.
Notice that you can't use more than one script-fu dialog at a time. So don't open a script and one more after that. The last one will never be opened and displayed.
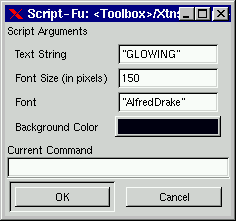
In the logos submenu you'll find scripts which can generate logos for you. This is nice but use it with care as people might recognize your logos as generated by Gimp. I would regard it as a base for a logo that I can modify to fit my purpose. The dialog for making a logo is more or less the same. In the "Text String" field you type your logo name, like Frozenriver. In the "Font Size" text field type the size of your logo in pixels. In the "Font" text field type the name of the font that you want to use in your logo. Be careful here, because if your font isn't installed in your Xserver, the script will fail. More about installing fonts in Appendix X. To choose the color of your logo, just click on the color button. This brings up a color dialog, more about this in chapter X. In the current command field, you can watch the script run. 
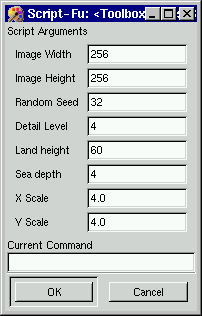
In the patterns submenu you'll find scripts which makes patterns for you. It's quite useful since you can add many arguments to your pattern. We'll take a look at the Land script. In this script you will have to set the image/pattern size, what levels of random you want for your land creation. You must also supply values for the level of detail, land and sea height/depth, and the scale. Scale is the scale of your map as in a ordinary road map. 1:10 will be typed as 10.
Under Utils will you find small but nice script. We'll take a peek at Fontmap which will make an image of your fonts. You will have to type the names of the fonts you want displayed in the "Fonts" text field. A tip is to use xfonsel to see what fonts are installed. Custom gradient makes a gradient (rainbow color) in a custom size.

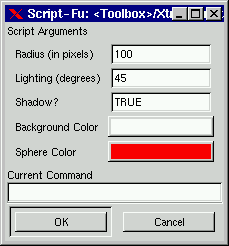
Under misc will you find scripts which achieve things you may have some use for, but isn't suitable for the other submenus. As an example, the Sphere which lets you make a Sphere which can be useful when you are making images with Gimp. You will have to set the radius in pixels to decide how big your sphere will be. The lighting angle is where at the sphere you point your spotlight. This value also has an impact on the sphere shadow.. If you don't want a shadow, you will have to type FALSE. The last thing you have to decide is background color, and the color of your sphere.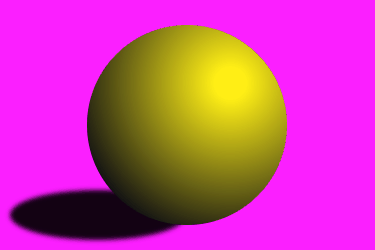
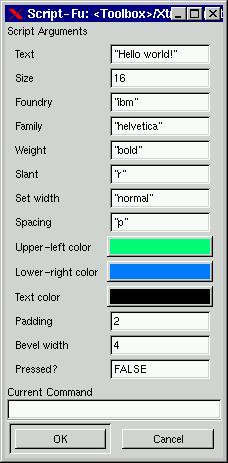
Under Buttons and "Web page thems"there are some scripts which makes life easier when you want to create your own custom arrows, bullets, buttons etc. for you web site. The scripts are quite self explaining but here are some hints. Leave all strange characters like ' " intact, make sure that your pattern exists. To check this, bring up the pattern dialog. The same goes for text in buttons. Make sure that the font exists! Open xfonsel or a similar tool to check it. For an explanation of fonts, see chapter X. Padding refers to how much space you want around your text. A high value for bevel width gives the illusion of a higher button. If you type TRUE to "Press" the button will look pressed. Choose transparancy if you don't want a solid background. If you choose a solid background, make sure it is the same color as your webpage background.
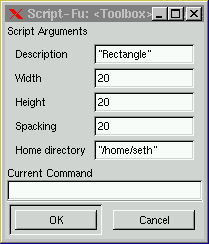
Brushes lets you make your own custom rectangular/circular brushes with or without feathered (blurred) edges. To ensure full control over the parameters you will have to look in chapter X. The main thing in the dialog is to set your home directory. For me it will be "/home/olof/" and the script will automatically store your brush in your personal brush directory. You just have to press refresh in the brush selection dialog to use your newly created brush.
There will of course be more scripts as time goes by, and Gimp users create new scripts all the time. We at Frozenriver will try to keep this chapter as updated as possible. The scripts described in this chapter were all released with the 0.99.pre11.3.5. version. As mentioned before in this manual, we encourage you to submit your scripts to the Gimp community, see Appendix X for info. For a preview and a short bulleted explanation of all scripts see Appendix X.
[Top] [Prev] [Next] [Bottom]
karin@frozenriver.ale.se
Copyright © 1997, Karin Kylander