|
Chapter 24Building and Installing the Perl 5 Interpreter
CONTENTS
This chapter covers the gory details of installing Perl 5 on a given system. First, you find out where to get the distributions via the Internet. Then you learn the details of some of the things you need to do to get the Perl 5 package built and installed on to your machine. I cover building the sources for a UNIX system here in detail because this is what most of the sources are targeted for anyway. However, I also cover how to get Perl 5 on other platforms. Getting Perl 5There are several ways to get the Perl 5 package for your system. Some of the ways include buying a commercial package, getting it from the Internet via FTP or e-mail, or having someone else get it for you. Getting Perl from the InternetThe latest Perl packages are usually available from any comp.sources.misc archive on a given news site. The latest source distribution will almost always be at Larry Wall's site. Here's the address: ftp://ftp.sems.com/pub/outgoing/perl5.0/ Larry Wall maintains the official distribution site (for both perl4.036 and perl5) at his site. Always check this site first for the latest versions and, if you are the brave sort, for the beta releases being worked on.
A number of archives have materialized over the years, and these
archives hold Perl source code and related items. Probably the
largest archive is at the University of Florida. The Comprehensive
Perl Archive Network (CPAN) is a collection of all Perl materials
including source files, modules, and documentation. In order of
probability, these other sites should also have the Perl source
files:
ftp://ftp.cis.ufl.edu/pub/perl/src/5.0/
By the time you get this book, this listing might be superseded by newer sites. The best course of action is to use archie or a Web search site such as Yahoo to search for the words Perl, CPAN, or Perl5 to get the list of the latest versions of Perl 5 packages. Getting Perl via E-mailIf you do not have direct FTP access, all is not lost. You can get the packages via e-mail. Table 24.1 is a small list of known FTP mail sites. As a general rule, you should always attempt to use the site closest to you with the FTP archive closest to it. Many of these sites already have Perl on them.
For information on how to use one of these sites, send e-mail
containing the word help to the address.
Send a message to mail-server@cs.ruu.nl
containing this:
begin You can omit the path line if your message contains a normal From: line. You'll receive a help file and an index of the directory that contains the Perl materials. Web Sites with Perl Information
The following Web sites contain information on Perl 5. You can
get more listings by using the Net search facilities on the Web
by searching for the keyword Perl5.
http://www.metronet.com/perlinfo/perl5.html
Naturally, your Web search tool will return a different list of directories. These sites will get you started at the very least. The FAQ for Perl 5 is available at this site: http://mox.perl.com/perl/faq On CD-ROM
The best collection I've found to date is the InfoMagic release
of the CD-ROM Mother of Perl. This two-disc set includes
the archives, mailing list archives, and lots of mirrors of CPAN
sites. My disc was up to 5.001m, but a more current disc set should
be available at the time this book goes to print. For more information
contact InfoMagic at this address:
InfoMagic Installing Perl on Most UNIX SystemsInstalling Perl takes time, but it's easy. I cover the installation on a UNIX-based system because this covers the most general installations of Perl. Please check the section titled "Other Platforms" for more instructions if you are not on a UNIX platform. Here are the basic steps to follow:
First, unzip and untar the Perl 5 package in a directory not in the /usr directory tree. You'll install this distribution in the /usr or /usr/local later. For now, just use a subdirectory in your home directory.
Go to the directory where you downloaded your Perl distribution.
Then unzip and untar the distribution files with these commands:
$ gunzip XXXX.tar.gz
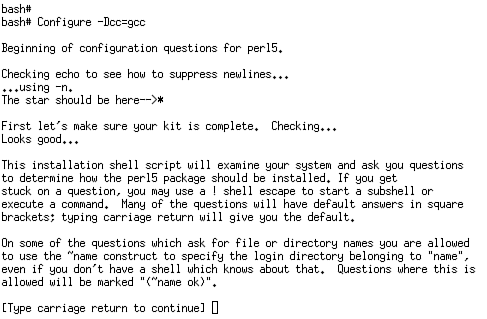
where XXXX is the name of the Perl distribution you got from the Internet. At the time this book was written, this was perl5.002.tar.gz. The 5.002 version is installed and used for all examples in this book. The INSTALL file is the master document you need to refer to if this chapter does not get you started. The text in the INSTALL file is in the plain old documentation (pod) format. Run pod2man to get the documentation in the man page format. The MANIFEST file should contain the information you need on what files go where. The files after untarring the package should look like those shown in Listing 24.1. Your Perl directory should contain the following source files after you untar the package: Listing 24.1. MANIFEST files content list. Artistic configure hints op.h proto.h Changes cop.h hv.c opcode.h regcomp.c Changes.Conf cv.h hv.h opcode.pl regcomp.h Configure deb.c installman os2 regexec.c Copying doio.c installperl patchlevel.h regexp.h EXTERN.h doop.c interp.sym perl.c run.c INSTALL dosish.h keywords.h perl.h scope.c INTERN.h dump.c keywords.pl perl_exp.SH scope.h MANIFEST eg lib perlsh sv.c Makefile.SH emacs makeaperl.SH perly.c sv.h README embed.h makedepend.SH perly.c.diff t README.vms embed.pl makedir.SH perly.fixer taint.c Todo ext malloc.c perly.h toke.c XSUB.h form.h mg.c perly.y unixish.h av.c global.sym mg.h pod util.c av.h globals.c minimod.pl pp.c util.h cflags.SH gv.c miniperlmain.c pp.h utils config_H gv.h mv-if-diff pp_ctl.c vms config_h.SH h2pl myconfig pp_hot.c writemain.SH configpm handy.h op.c pp_sys.c x2p Configuring Your Perl DistributionTo configure your system, first run the Configure command in the perl5 directory where your source files were untarred. The Configure command will figure out various settings about your system. Configure will be able to default to many settings by itself; for other things it will ask you about. Figure 24.1 contains the output from the Configure command. Figure 24.1 : The output from a configure command. If the test scripts and programs run okay, the defaults are usually right. Configure will then create a set of defaults for itself and then proceed to make three files to store these sets of defaults: config.h, config.sh, and Makefile.
If you feel lucky, run Configure -d to take all the defaults, and edit config.sh yourself to patch up any flaws. I do not recommend this course of action unless you're a Perl wizard, in which case you probably would have skipped this entire chapter. The Configure command supports a lot of options. The one option to know about is the -h option, which prints a list of the available options for Configure. The options are useful in overriding any predefined values. For example, you may have cc's and GNU's compilers both on your system with cc as the default. To force Configure to use gcc-elf, run the command Configure -Dcc=gcc-elf. Alternatively, in the interactive mode, you can answer gcc-elf at the cc prompt. By default, Perl will be installed in the following directories:
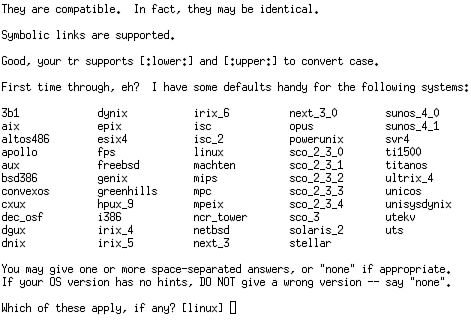
You can specify a different directory for the default installation location as long as you have read and write access to the directory. The default directory pathname can be changed with the -D flag; for example, for specifying a pathname to a subdirectory in my home directory I would use the command line option -Dprefix='/home/khusain/perl5'. The replacement for /usr/local is changed when you respond to the question of prefix in Configure script. A couple of other points about running Configure: Do not reuse your old config.h or config.SH file from a previous version. Too many things may have changed. This is true for patches to the Perl package as well. If you want to see some differences, save a copy of the old file, rerun the Configure command, and then run a diff command to see the differences. Actually, if you have some overrides that you want to use regardless of those set up with Configure, you can put them in a file called config.over. This file can be used by Configure and overrides any values just before it writes the config.sh file. To get a head start, copy config.sh onto config.over, and then edit config.over. The details of this procedure are given in the INSTALL document. Perl will use any dynamic extensions if your system supports them. If you want to force Perl to be compiled and linked statically, then you can choose this when Configure prompts you about it. Most of the later versions of Perl use dynamic loading; therefore, if your system does not support it, consider upgrading. See the section: "Linux: A Special Case for Perl 5," in this chapter to see what some of the issues are. While you are running Configure, be patient. Answer each question after reading it carefully. Yes, the defaults are great, but ultimately you are the one who has to run Perl on your system. Make sure you know enough about your system to know if the defaults look right or not. If your system is not recognized, you'll most certainly have to answer questions alertly. The Configure script tells you if it has recognized your system, as shown in Figure 24.2. Figure 24.2 : Recognition of a computer system by the configure command. Also, do not hold down the Enter key or press it too many times. The returns may remain queued and provide a default reply when you really did not mean to. There is no way to back up or re-enter all the information if you make a mistake. You have to start the entire process all over from the initial Configure command. Keep this in mind as you answer the questions. You can backspace on the current line, but you cannot go back to the previous prompt. The prompter will recognize $* as the entire default line should you want to append to the default values given. Arguments to responses can also be referred to as $1, $2, and so on to keep you from too much typing or typographical errors. Use sh at least or some other shell instead that looks like the Bourne shell for the purpose of this installation. If you are bent on using your own version of csh, you'll have to copy the sample file config_H to config.h, and edit config.h to adapt to your shell. Now would be a good time to peruse the config.h file to make sure that the system dependencies are correct. Most of them are taken care of by running the Configure script, but this will give you some insight on how the configuration sets everything up. If you have any additional changes to make to the C definitions, make them in the cflags.SH file. For example, to turn off the optimizer on toke.c, find the line in the switch structure for toke.c and put the command optimize='-g' before the double semicolons. By default, the value is set to $optdebug.
To change the C flags for all the files, edit config.sh
and change either $ccflags
or $optimize. In order to
ensure that the changes you have made to these header files propagate
to all other programs, you must run the following command:
Configure -S ; make depend
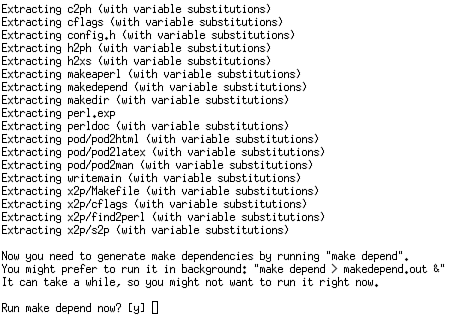
Making DependenciesAfter you've configured your Perl package for your system, you must set up all the dependencies for the source files. This is done by typing the command make depend. The make file looks for all the affected include files and modifies the Makefile accordingly. The Configure program will offer to do this for you; you just have to answer Yes, as shown in Figure 24.3. If you do not get this prompt, you can always run it from the command line. Figure 24.3 : Running make depend from configure. Now, attempt to make Perl in the current directory. Run the make command from the prompt without any arguments. The execution of this make command will take a while. Generally speaking, you should encounter no errors. If you see errors and if these errors impede the development of the platform, the make program will terminate. If the errors are not critical or can be compensated for, make will continue and generate the correct files for you. Linux users should refer to the online documentation on ELF in Linux. No errors during the compile phase does not equal a clean build in this case. Finish the entire procedure by testing the installation. You may see some warnings, too. Again, this depends on the platform on which you are building Perl. In most cases, the warnings can be ignored. If you do see warnings about LITTLE_ENDIAN being redefined, ignore them. For your peace of mind, you might want to check the definitions of LITTLE_ENDIAN in the files that the make file warns you about. Both the declarations should be the same-that is, either 1234 or 4321, depending on the type of machine you happen to be building the version of Perl on. The gcc compilers installed in your system should be able to handle the Perl distribution with only a few burps. For example, some function prototypes might not be recognized by the compiler. There is a way to counter some of these errors. For instance, try adding a -DCRIPPLED_cc flag. You might even consider turning off the -O2 optimization flag in config.sh in your compiler. If you get duplicate function definitions (a Perl function has the same name as another function on your system), try using the -DEMBED switch to get rid of the error. These errors are rare, but not impossible to come by. The worst error you could run into is an incomplete distribution. In this case, the only recourse you have is to abandon all efforts with your distribution and just start over with a fresh release from the Internet. Chances are that even if you actually paid someone for this crippled Perl release, they won't be interested in providing you with free support. The config.sh file is the one you need to know about if you have to modify the compiler switches. The file is too long to list here, but I have listed some of the switches that you should definitely take a look at if you need to correct something:
installprivlib='/usr/lib/perl5' installscript='/usr/bin'
installman3dir='/usr/lib/perl5/man/man3' man1dir='/usr/man/man1' man1direxp='/usr/man/man1' man1ext='1' man3dir='/usr/lib/perl5/man/man3' man3direxp='/usr/lib/perl5/man/man3' man3ext='3'
startsh='#!/bin/bash' Some compilers will not compile or optimize the larger files without some extra switches for using larger jump offsets or allocating larger internal tables. Perl without any extensions is referred to as Miniperl. If you run into problems while building with extensions, you should try to build Miniperl. If you can successfully build Miniperl but the process crashes during the building of extensions, you need to get the later versions of the extensions. In such an event, get a completely new package and try to avoid doing piecemeal patches, unless you know what you are doing-in which case you should not even be reading this chapter ;-) . Machines with incomplete dbm routines (specifically the dbm_open() function) will need to set the #undef I_ODBM preprocessor directive. For duplicate reference error messages when linking files that call malloc, try the -DHIDEMYMALLOC switch. Both of these problems did not disappear on my Linux machine until I upgraded the entire system and kernel to ELF. I did not have to use I_ODBM or the -DHIDEMYMALLOC flag after the upgrade. What Are hints Files?In the Perl distribution, you'll find a ./hints subdirectory. The ./hints subdirectory is where platform-specific declarations are kept. The files here are used by Configure to set things that Configure either cannot or does not guess properly. You may have to edit these files for special versions of your computer operating system. Generally, you should not have to use the hints file if you are using a UNIX-like operating system. Check the contents of this directory to see whether your system is listed and whether Perl works correctly with it. Check the README.hints file for a list of those systems for which Perl has been tested. A sample listing of the linux.sh file is shown in Listing 24.2. Listing 24.2. The linux.sh hints file. 1 # hints/linux.sh 2 # Original version by rsanders 3 # Additional support by Kenneth Albanowski <kjahds@kjahds.com> 4 # 5 # ELF support by H.J. Lu <hjl@nynexst.com> 6 # Additional info from Nigel Head <nhead@ESOC.bitnet> 7 # and Kenneth Albanowski <kjahds@kjahds.com> 8 # 9 # Consolidated by Andy Dougherty <doughera@lafcol.lafayette.edu> 10 # 11 # Last updated Tue May 30 14:25:02 EDT 1995 12 # 13 # If you wish to use something other than 'gcc' for your compiler, 14 # you should specify it on the Configure command line. To use 15 # gcc-elf, for exmample, type 16 # ./Configure -Dcc=gcc-elf 17 18 # perl goes into the /usr tree. See the Filesystem Standard 19 # available via anonymous FTP at tsx-11.mit.edu in 20 # /pub/linux/docs/linux-standards/fsstnd. 21 # Allow a command line override, e.g. Configure -Dprefix=/foo/bar 22 case "$prefix" in 23 '') prefix='/usr' ;; 24 esac 25 26 # Perl expects BSD style signal handling. 27 # gcc-2.6.3 defines _G_HAVE_BOOL to 1, but doesn't actually supply bool. 28 ccflags="-D__USE_BSD_SIGNAL -Dbool=char -DHAS_BOOL $ccflags" 29 30 # The following functions are gcc built-ins, but the Configure tests 31 # may fail because they don't supply proper prototypes. 32 # This should be fixed as of 5.001f. I'd appreciate reports. 33 d_memcmp=define 34 d_memcpy=define 35 36 # Configure may fail to find lstat() because it's a static/inline 37 # function in <sys/stat.h>. 38 d_lstat=define 39 40 # Explanation? 41 d_dosuid='define' 42 43 # I think Configure gets this right now, but I'd appreciate reports. 44 malloctype='void *' 45 46 # Explanation? 47 usemymalloc='n' 48 49 case "$optimize" in 50 '') optimize='-O2' ;; 51 esac 52 53 # Are we using ELF? Thanks to Kenneth Albanowski <kjahds@kjahds.com> 54 # for this test. 55 cat >try.c <<'EOM' 56 /* Test for whether ELF binaries are produced */ 57 #include <fcntl.h> 58 #include <stdlib.h> 59 main() { 60 char buffer[4]; 61 int i=open("a.out",O_RDONLY); 62 if(i==-1) 63 exit(1); /* fail */ 64 if(read(i,&buffer[0],4)<4) 65 exit(1); /* fail */ 66 if(buffer[0] != 127 || buffer[1] != 'E' || 67 buffer[2] != 'L' || buffer[3] != 'F') 68 exit(1); /* fail */ 69 exit(0); /* succeed (yes, it's ELF) */ 70 } 71 EOM 72 if ${cc:-gcc} try.c >/dev/null 2>&1 && ./a.out; then 73 cat <<'EOM' 74 75 You appear to have ELF support. I'll try to use it for dynamic loading. 76 EOM 77 else 78 cat <<'EOM' 79 80 You don't have an ELF gcc. I will use dld if possible. If you are 81 using a version of DLD earlier than 3.2.6, or don't have it at all, you 82 should probably upgrade. If you are forced to use 3.2.4, you should 83 uncomment a couple of lines in hints/linux.sh and restart Configure so 84 that shared libraries will be disallowed. 85 86 EOM 87 lddlflags="-r $lddlflags" 88 # These empty values are so that Configure doesn't put in the 89 # Linux ELF values. 90 ccdlflags=' ' 91 cccdlflags=' ' 92 so='sa' 93 dlext='o' 94 ## If you are using DLD 3.2.4 which does not support shared libs, 95 ## uncomment the next two lines: 96 #ldflags="-static" 97 #so='none' 98 fi 99 100 rm -f try.c a.out 101 102 if /bin/bash -c exit; then 103 echo You appear to have a working bash. Good. 104 else 105 cat << 'EOM' 106 Warning: it would appear you have a defective bash shell installed. This is 107 likely to give you a failure of op/exec test #5 during the test phase of the 108 build, Upgrading to a recent version (1.14.4 or later) should fix the 109 problem. 110 111 EOM 112 113 fi 114 115 # In addition, on some systems there is a problem with perl and NDBM, which 116 # causes AnyDBM and NDBM_File to lock up. This is evidenced in the tests as 117 # AnyDBM just freezing. Currently we disable NDBM for all linux systems. 118 # If someone can suggest a more robust test, that would be appreciated. 119 # This will generate a harmless message: 120 # Hmm...You had some extra variables I don't know about...I'll try to keep 'em. 121 # Propagating recommended variable d_dbm_open 122 d_dbm_open=undef A hint is simply a shell script run by Configure that sets things it needs for your system. Usually the hint files are documented well enough to know why certain variables are defined.
And sometimes they're not. It's usually not that hard to figure
out what the define is about,
though. Case in point: the lines from the linux.sh
file. Turning malloc off
turns off Perl's version of malloc.
There is really no need for an explanation here:
# Explanation?
I use linux.sh here as the
example because it's the system I happen to run. If you are on
an SCO system, you have some choices to make, depending on the
type of system you have. Here are the hints
files included with 5.002:
3b1.sh dnix.sh irix_6.sh&nb
sp;
opus.sh svr4.sh Running Some TestsJust because everything compiled doesn't mean you are out of the woods. You have to run the regression tests on the perl you just made. You should see the message All tests successful. (See Figure 24.4.) Figure 24.4 : Results from a test run. If it doesn't say All tests successful, something went wrong. Figure 24.4 shows a sample run without any error messages.
In the unfortunate event that you do not see the successful message, you have to figure out what went wrong. Go to the t directory. (I just love these directory names in UNIX.) Then run the TEST command to see the results. If an individual test has cratered, you can run that test manually with this command: ./perl op/groups.t Note that in the t directory, ./perl is linked to ../perl. This is a fully working version of the real enchilada! Finishing It UpYou've now run the test, and the doubts in your mind are a faded memory. Let's discuss how to install Perl so that other users on your system are able to use it. It would be a good idea to run as root now if you are writing in the /usr tree. Of course, you could have specified a totally different location over which you have write privileges-in which case being root is a moot point. Keep in mind that if you are not root, you must own the directories where you are writing and ignore any messages about chown not working. Now, take a deep breath and run the make install command: make install This command puts Perl into a public directory. If you used the defaults, the location is /usr/local/bin. The make install command will also try to put the man pages in a reasonable place, possibly under /usr/man. You may have to nroff the man page yourself, though. (In newer systems, the first time you run the man(1) command, it will automatically run nroff and update the cat-files for you.) The make install command creates the following files for you (I'm using /usr/local/bin as the default location):
The library files go in $privlib
and $archlib as defined in
the Configure.sh file. (This
is defaulted to /usr/local/lib/perl5/.)
The Perl documentation pages go in /usr/lib/perl5/pod/.
Perl's *.h header files and
the libperl.a library are
also installed under $archlib
so that you may later build new extensions even if the Perl source
is no longer available. The man
pages go in After the installation is complete, you should see the message Installation complete, as shown in Figure 24.5. If you do not see this message, you have to run this script again to see what went wrong. Chances are that either you do not have permission to write to the directories you requested or that the directory in which you chose to install Perl doesn't have the space, or both. Figure 24.5 : Installation and verification. This is optional. If you want to make the documentation available in man, HTML, or TeX format, use the following commands for HTML files: cd pod; make html For the documentation in TeX format, from the Perl source directory type the following command: cd pod; make tex Man pages are available for individual pod files via this command: pod2man myfile.pod | nroff -man | less Actually, if you're given a .pod file, running the pod2html command produces HTML files for you to peruse. I find that it's easier to search and read these HTML files using a Web browser than it is to mess around with TeX and man page files. Confirming the Installation
To confirm that you've indeed installed Perl on your machine,
type the perl -v command.
You should see the output shown here:
$ which perl The DOS PlatformA beta version of Perl based on the Perl 5.000 version is available in binary form only, from this site in Canada: ftp://ftp.ee.umanitoba.ca://pub/msdos/perl/perl5.
The perl5a.README file with
this version of Perl has a very ominous warning message with it.
The message reads verbatim:
THIS VERSION MAY HAVE BUGS, AND HAS A
HIGHER THAN "USUAL" chAncE OF CORRUPTING
YOUR DISK. BACK UP YOUR HARD DISK BEFORE
USING THIS VERSION. This was enough to warn me not to install them on my machine. I'm still happy with perl4 with DOS, thank you very much. If you're a hotshot, be my guest. For more information about this port, please contact the author, Darryl Okahata, at darrylo@sr.hp.com. The versions under development include those for DOS and Microsoft windows. If you feel that you must work with Perl 5 features and have to work under DOS, you're stuck. Perhaps you should consider installing Windows 95 or NT on your machine and running the version of Perl 5 for Windows NT. Please see Chapter 9, "Portability Issues with Windows and Perl." Other PlatformsPerl 5 is being ported to other platforms and is at various stages of development. Some common platforms are listed here. You should check out these locations. In general though, you'll find only binary files and not the sources. I found the following ports in various stages of development at the FTP site ftp.funet.fi:
Check the directories in /pub/languages/perl/CPAN/ports. There may be other levels of subdirectories below these directories. Some have documentation, some source only, and some complete packages. For example, the winNT subdirectory has a Perl 5.001m port in ./winNT/perl5/perl5.001m, whereas the amiga directory just has one file in it. As you can see, there is considerable effort being put into porting this powerful language to other platforms.
Linux: A Special Case for Perl 5Notably missing from the previous list is the Linux operating system. With the Linux operating system, you'll need the Executable and Linking Format (ELF) binaries to use the dynamic loading features in Perl. All major releases of the Linux kernel and libraries will support the ELF format in the future. If you do not have ELF binaries, you might be left behind. The motivation for going to ELF is simple: The sheer size of static libraries makes it very prohibitive to construct small applications anymore. Also, the current a.out format for libraries does not permit the use of the dynamic loading function dlopen(). Using dynamic loading is critical for the newer programs that are coming out for newer UNIX and UNIX clone systems.
The way to tell whether you are already running ELF binaries is
to compile a short program and then run the file
command on it. The ensuing output from the file
command should be the following if you are running the ELF binaries:
$ file `which gcc`
Also, check the version numbers on your Linux kernel. Type the
following command to check to see what your version number is.
The non-ELF binaries will be located in the 1.2.13 version. Most
versions after 1.3.18 are ELF compatible:
$ file `which perl` On ordering a Linux distribution and after going through the normal installation process, I found that my system defaulted to 1.2.13 and no option on the installation screen allowed me the choice to switch to an ELF system. Newer releases of Linux (March 1996 and later) give you options to install ELF binaries and source files. You can build the ELF kernel using the existing kernel and gc binaries. In order to build the binaries, you have to have the following items:
The binary ELF compiler, gcc, is available from sunsite.unc.edu. The files are located in the Linux /packages/Gcc directory on most Internet sites. The latest version of the gcc compiler is 2.7.2. The binary files can be downloaded from the Internet and unzipped in the root directory. (The ELF-HOWTO file is correct in this regard.) Just get the gcc binary files and read the instructions on how to unzip, untar, and install the binary files.
To unbundle all the source files, you need the file linux-1.3.xx.tar.gz.
The xx in my case
is 20; however, by the time this book goes to print, a newer release
might be out. (It's probably in your best interest to get the
latest release from the Internet archives.) Next, go over to the
/usr/src directory and, as
root, unzip and untar this source file you have just downloaded.
After untarring the files, your directories should look very close
to this:
total 113
Now confirm that your gcc
is installed correctly. Type the following command to see whether
the version number is correct. The ensuing version from the following
command should be 2.7.0 or higher. If you downloaded the binaries
from tsx-11.mit.edu, the
version will be 2.7.2:
$ gcc -v
Now create the kernel using the following commands, in this order:
cd /usr/src/linux Depending on the type of pc you have, each command will take some time-so be prepared to wait. After you have made the kernel, copy it to the root. Then run setup to reinstall LILO and point to this new kernel as the boot kernel. Next, reboot.
After rebooting, you can always use the version number check with
the gcc -v command. Then
check version numbers in the /lib
directory. The version numbers in your system may be higher, but
you should have at least the version numbers listed below for
the libc and libdl
files:
-rwxr-xr-x 2 24580 Feb
22 22:44 ld.so.1.7.14 In this list, notice how the links are created from minor version numbers, to version numbers, and then finally to the actual version number. It's important to keep the *.so files present for those files that require the .so extension. Also note the types of files now in the /lib directory. You'll notice both the ELF and a.out files in there. The ELF kernel is capable of loading both ELF and a.out shared libraries. Actually, working with ELF binaries does make everything a bit slower, but the advantage gained by loadable modules is worth the loss in speed. Once your system is up to ELF, run the Configure script for Perl. Make sure you answer yes to the question about dynamic loading. Then, for the type of dynamic loading, select the dl_open option. The rest of the questions are quite easy and should work with defaults. The Configure script will even run the make file for you to create Perl. Run make from within Configure when prompted at the end of the script. After the Perl files are built, run the make test command. There should be no errors once the dust settles. If there are errors, your ELF distribution is not complete, and you should look at the errors when creating the make file and binaries in the /usr/src/linux tree. It will be a long night. A few files that will cause you grief are the GDBM* library files. The sources for these files are in the d package set for Linux. Copy these source files to /usr/src/linux. Compile and install one file at a time until the errors disappear. I actually have found that the Perl installation test has been the most comprehensive test for checking my Linux ELF system to see whether everything is there. Until someone comes up with a better test, you may want to use this as your benchmark, too. Partial Upgrades of Your Linux Kernel for Getting Perl Running
Linux source files are really not meant to be updated to ELF piece
by piece. The note in the file UPGRADE.TXT
points to that. Here's what the note says:
24-Aug-95 NOTE: Trying to upgrade to
ELF Slackware from a.out Slackware will Believe this message. The details of doing a partial upgrade are listed in the file ELF-HOWTO. However, the warning from the author of this note did hold. I followed the instructions in the HOWTO file to the letter…well, almost. Even after getting the requisite binaries from the FTP sites listed in the HOWTO files, the programs that were supposed to work, didn't. Either the binaries were incompatible or I was missing files, or both. Modifying the LDPATH environment variable led to all sorts of problems. The Real Danger During the Partial UpgradeDuring this partial upgrade process, I accidentally deleted the /lib/ld.so file. This really big error alone rendered my entire Linux system useless because just about every command in the Linux /bin tree uses this /lib/ld.so file for execution. Not good. The only way to recover from this was to perform the following steps:
SummaryThis chapter walked you through the installation steps for getting Perl on your system. Hopefully, things went smoothly and you did not have to resort to editing script files. However, in this chapter you should have gleaned enough information to be able to fix anything that is broken.
|
||||||||||||||||||||||||||||||||||||||||||||||||
|
With any suggestions or questions please feel free to contact us | |||||||||||||||||||||||||||||||||||||||||||||||||