|
Plug-ins; description and functionIn this and following chapters we'll take a walk down the Filters menu, and see what kind of goodies are hidden there. This time we it will be Blur and Darkroom plug-ins Blur Plug-ins
"Blur" simply blurs your image and makes it more soft. There are no parameters in this plug-in. Sometimes it can be necessary to blur more than once to get the desired effect. You can choose to blur parts of an image to shift the focus to the sharper parts, or you may wish to soften hard edges of an object.
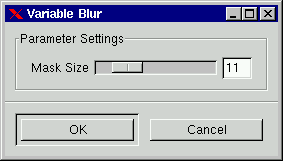
Here you have a variable blurring method, and its based on the radius of the blur. Higher radius will get you a higher amount of blur (values less than 1.0 are invalid). You can also choose to blur in vertical/horizontal or both directions. This makes it possible to imitate a motion blur. Gaussian blur is best for on scanned images and other natural images. Gaussian Blur (RLE):This is the same as above, but is best used on computer made pictures.
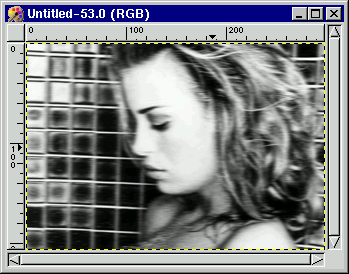
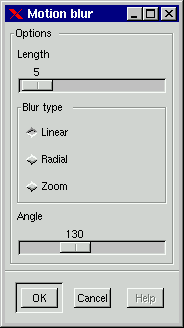
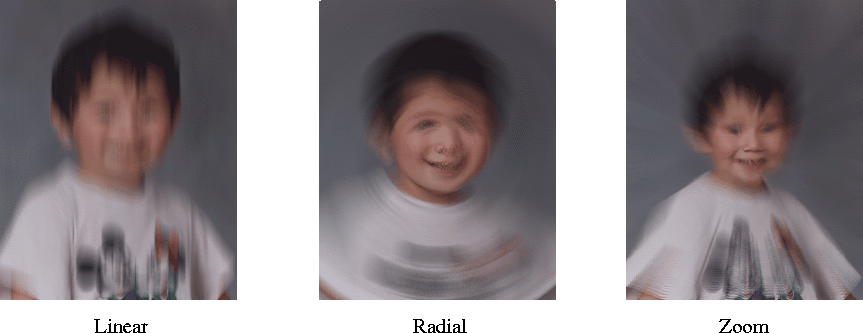
This plug-in imitates a snapshot of a moving object. If the blur type is Linear, it will look as if the object was moving beside you, and that the angle between you and the object was 90deg.The Angle is the direction of the faked motion, Length is the speed of the motion. More length means higher speed. If the blur type is Radial, it will look like the object was rocking in front of you. In this case, the angle determines the amount of rocking. A high value for Angle will make it look like the object was spinning. The Length determines how fast the object is rocking/spinning. If the blur type is Zoom, the object will look as if it was moving away from you. Here, Length is the speed with which the object is moving away from you. Angle seems to have no impact on this blur mode.
Like the ordinary blur but you can also set how much blur you want to have. Darkroom plug-ins
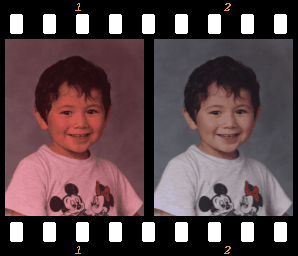
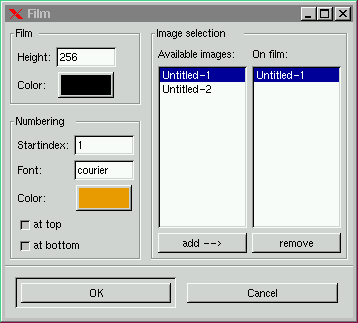
This plug-in creates a "film" of two or more images opened in Gimp. This plug-in can be really nice to use in an advertisement or in a paper. I bet that you have seen effects like this one in magazines.
"On film" shows the pictures on your film. To change the order of the pictures, you have to add and remove pictures so they will come in the order you want. Height is the height of the outcoming film. Color is the film color. The plug-in will automatically adjust your images so that they will fit. Numbering lets you specify a start number on the roll, and the Font (warning! - you have to have the font installed), color is the number color in your film. Both the color on the film itself (usually black though) and the color of the numbers can be changed by clicking on them. Check the "at top" and "at bottom" if you want numbers there, otherwise uncheck.
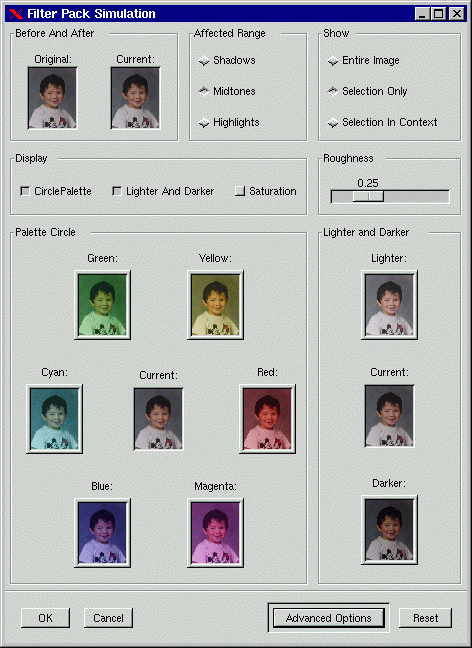
This is a real darkroom tool, and you can do most adjustments that you could do in a real lab. First decide what brightness value you want to affect, Shadows, Midtones, or Highlights. The Show Art is for preview. If you use a selection, you can press Selection Only to only preview the selection. Display decides what kind of values you are interested of changing, and therefore want to have a view of. The Palette Circle lets you change the color of the image. If you want your image to look a bit bluer, just press the blue preview. Lighter and Darker lets you change the amount of light in the image. Saturation (not in the screen dump because of the size) lets you change how colorful you want your image to be. Roughness refers to how much you want to alter your image. A higher value will allow you to change a lot, but on the other hand you will lose in precision. In Advanced Option can you set your preview size (good if you have a large screen). You can also check "Pixel Selection Menu" which lets you set what kind of HSV value you want to change. The pixel selection lets you change one of the HSV values. The pointers in the curve lets you alter the range of shadows, midtones and highlights in a brightness scale from 0 to 255. The slide bar alters the smoothness of the transition from one shade to another. If you set it to zero, only the selected range (shadows, midtones, highlights) will be affected by your interaction. If you set it to 1, every range will be affected. A value in the middle is the most appropriate because as the name says, you want a smooth transition. This tool is a real masterpiece. It is true that you can do all this thing by using other tools in Gimp and maybe with a better precision, but this tool has a natural interface. It's just perfect to fix old and faded pictures, or images with other kinds of color distorts.
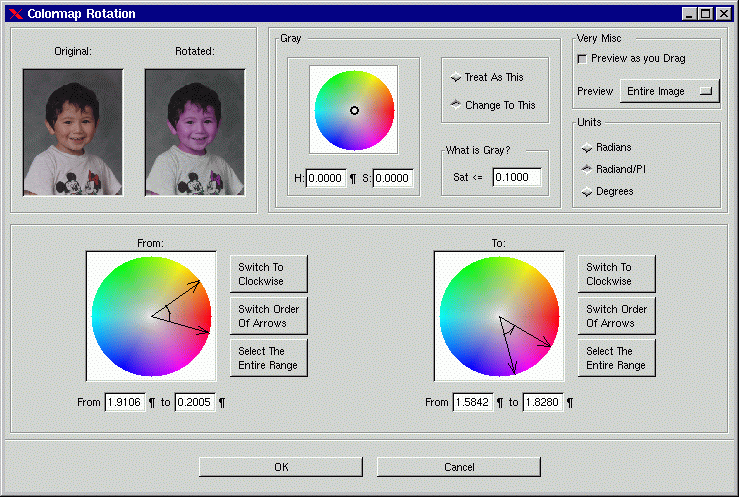
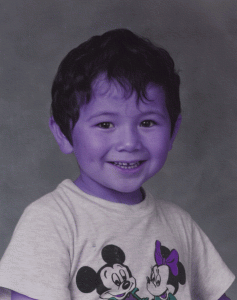
The color map rotation lets you change one color interval to another. The Gray field is where you define what gray is, and how you are going to deal with it. The field "What is Gray" is where you define gray. It will be defined in the Saturation scale going from 0 to 1, where a "pure" gray is 0. This is often too narrow, so you will often have to say that gray is less or equal to 0.1 or 0.2. As you set this value, the circle in the Gray color circle will expand and cover more saturation values. The check boxes "Treat As This" and "Change To This" is for what you want to do with the gray you defined in "What is Gray". With "Treat As This" you tell the plug-in what color you want gray to be like. You do this by paning the little circle around in the Gray color circle. You can for example drag the define circle to the red part of the color circle, and all gray shades will be treated as red color when you do your color rotation. If you check "Change to This" all gray shades will be changed to the color you have paned the gray define circle to.
By default the range is going Counter clockwise, so if you define a range that you want to rotate, the rotation will map your pointers in the From: and To: color circles. If one of the fields is switched to Clockwise, the first pointer in a field will map the second pointer in the other field. Example: If you in the "From:" circle select a range from cyan to magenta, and the type is counter clockwise, and in the "To:" field select the same range, but this type is clockwise, then all cyan colors will be rotated to magenta. If you press the "Switch Order.." button the range will be inverted. Let's say you have a selection range that goes from cyan to magenta over blue, and you press "Switch Order..". Now the range will go from magenta to cyan over red and green. The button "Select The Entire Range" will of course select the whole range. You can also select what kind of Unit you want to use and what kind of preview you want. [Top] [Prev] [Next] [Bottom] karin@frozenriver.ale.se Copyright © 1997, Karin Kylander |
|||||||||||||||||
|
With any suggestions or questions please feel free to contact us | ||||||||||||||||||