|
Plug-ins; description and functionIn this and following chapters we'll take a walk down the Filters menu, and see what kind of goodies are hidden there. This time we will discuss Effect plug-ins Effect plug-ins
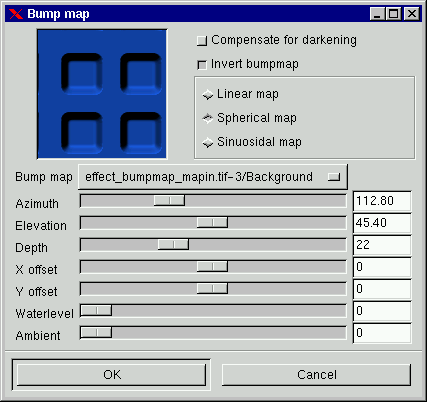
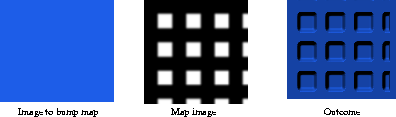
Bump map works by embossing an underlaying image, and then map it to your image. This will create a 3D effect on your image, just like if you had modeled your image in clay. First read about Emboss to understand Azimuth, Evaluation and Depth. There are many differences between Bump map and the bump map in the Emboss plug-in . First of all, in "emboss bumpmap" you can't specify the bumpmap image you want to "bumpmap with". (pict 2). The Bump map plug-in also has more options. And last, in this plug-in you can bumpmap any type of image. Because you can bumpmap with any image, you may be have to adjust where you place your background bump map. To do so use the X and Y offset slides. Bump map darkens a image because of its nature (see Modes). To compensate, just check the "Compensate for darkening" button. Because emboss raises light pixels and carves dark pixels, it quite simple to reverse so the otherwise dark and carved parts of your map will turn light and raised. To achieve this effect, check "Invert bumpmap".
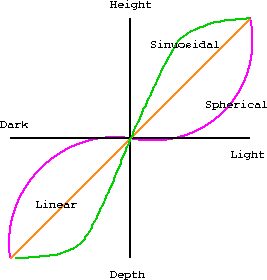
The ambient slide controls how much ambient light you want on your image. A high level of ambient light will make all shadows disappear, and your raised and carved parts will be less apparent. Water level? - what the hack is it? Well, you often have transparant part in your images. If you use transparancy in your map image, those pixels will be treated as dark pixels, and therefore become carved. If you slide your water level up to 255, they will be flattened and turn invisible, just as if you had raised the waterlevel. (If you use "Invert bumpmap" they will be treated as light pixels, and get raised. Using Water Level will flatten that too. So "Water Level" can be a "water raiser" but also a something of a bulldozer). "Linear map", "Spherical map" and "Sinuosidal map" can best be described as the tools you use to create your model. Figure 1 shows the relationship between different map modes, and how they raise/carve in relation to light/dark pixels.
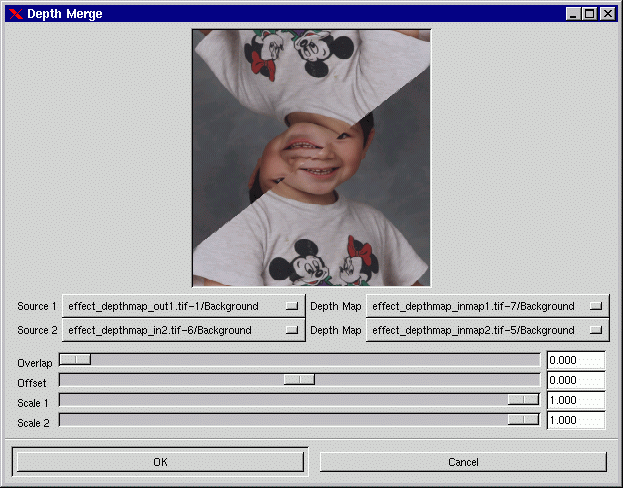
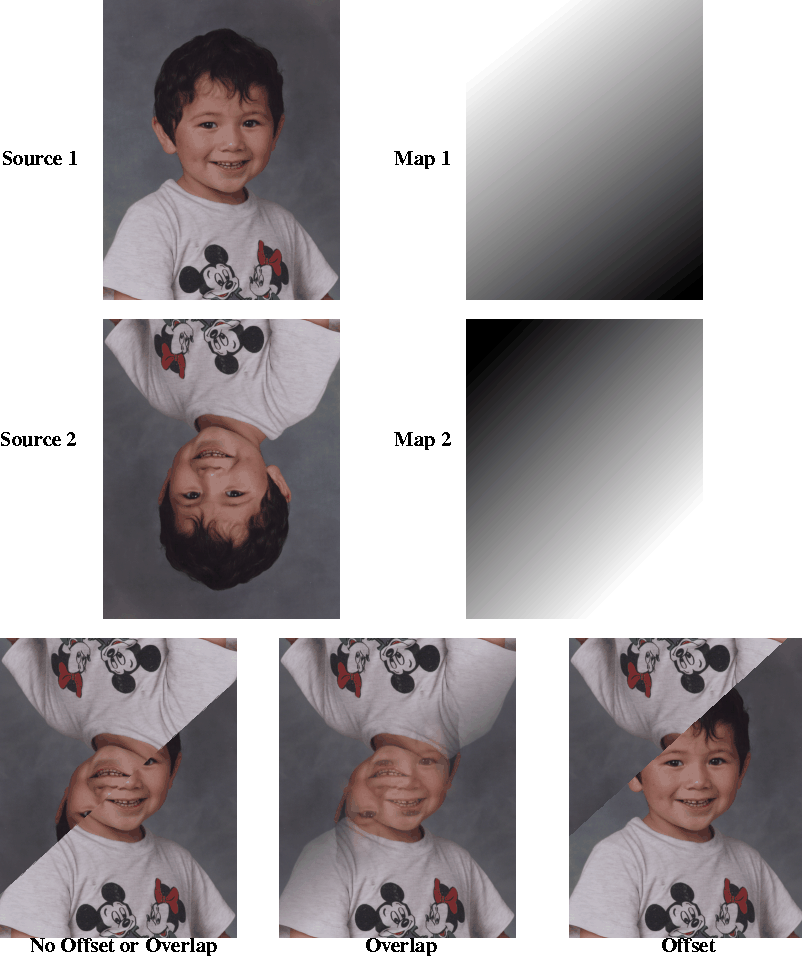
This is a very nice tool for combining two images. It combines them with the help of two map pictures. The map pictures have to be in grayscale (so you can control the outcome better). An example will make you understand. (see pictures). Take two images of equal size. Then create two new empty images with the same size as the original images. In one of the new images, take the blend tool and blend from black in the top left corner, to white in the opposite corner. For the other grayscale image, do the opposite. Black is bottom right and white is top left. Now, bring up the Depth merge dialog. Set "Overlap" to 0, set "Offset" to 0 and Scale"1" and "2" to 1.000. As source 1 you will take one of the first opened images, and as Source 2 you will take the other one. Use the first grayscale image as Depth Map to source 1, and the other one as map to source 2. Now the two images will get combined and a sharp border will go diagonally from the to right to the bottom left. Why? You see, the plug-in looks at both map images, and compare every pixel. The map with the darkest pixel will win, and the source to that map will get to show its image pixel. When we created our grayscale images, there was a clean line going diagonally Top Right to Bottom Left where the outcome of the comparation flipped from one map to the other. Now when you understand the basics, you can create all kinds of maps. Let's see what the slides can do for us. As in you saw in our example, there was a sharp border between the images. This was because the Overlap was set to zero. If we slide it up a bit, you will see that the border will be get more fuzzy and transparant. This is the variable to use to get soft transitions. Offset changes the darkness value of your maps. If you slide it to a negative value, the map to source 1 will get "darker" and therefore get more of the outcoming image. If you slide it to positive, the other map will get "darker" and get more of the outcoming image. The slides "Scale 1" and "Scale 2" make map 1 respectively map 2 darker or lighter. They have the same effect as Offset, but they are more sensitive to the hand
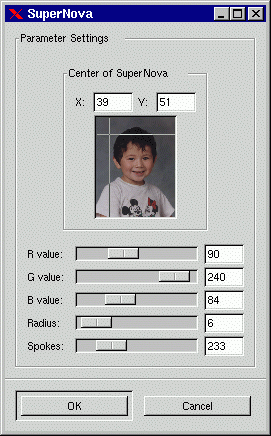
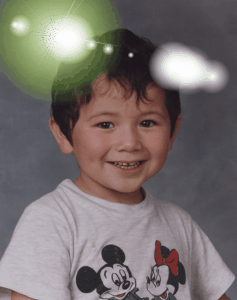
This plug-in creates a super nova in your image. The R,G and B slides decide the color of the supernova. You specify the color just like in the color selection dialog. The problem is that you can't see what the color looks like, until you apply the plug-in. I suggest you open the color dialog and choose a color there. When you're happy with the color, type the RGB values in the nova dialog). Radius is the radius of the inner part of the nova (the star part). Spokes determine how many spokes the nova will get. You place the nova with the grid in the "preview" image (you can also type the coordinates in the X and Y input fields)..
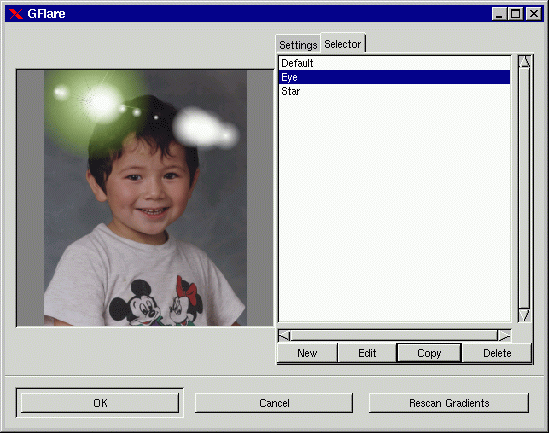
This plug-in is so gigantic, that we're going to discuss what you can do with it in the next ten pages or so. Just kidding, but it's really huge.. ;-).
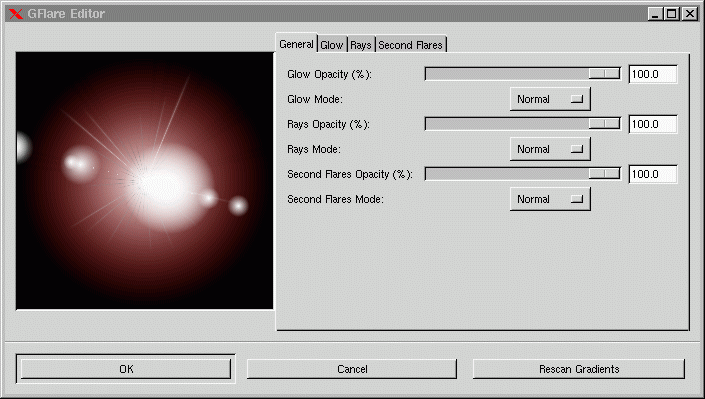
Let's start, press the "Selector" tab folder and copy the default pattern and name it something appropriate in the name dialog. Now we press edit, a new dialog will pop up, and that is the Gflare editor.
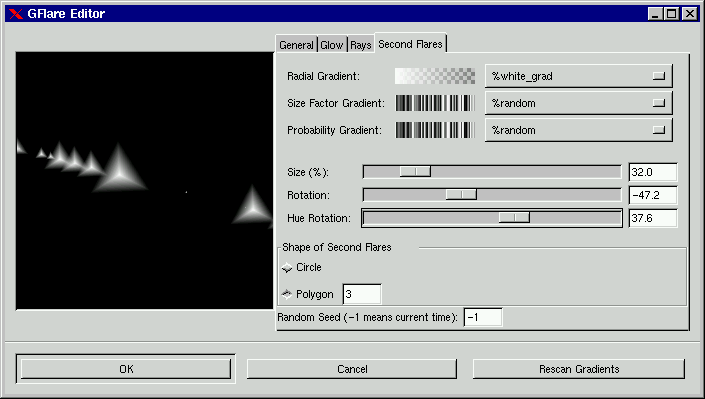
Here we have 4 tab folders, where you can edit the three foundations that the gflare is based on, and a general view where you can set all possible combinations. The three key-stones of Gflare are "Glow", "Rays" and "Secondary Flares". "Glow is the base foundation - the big fireball in the middle, "Rays" are the spikes that surround the "Glow" ,and finally "Secondary Flares" which is the attaching small "novas" in front and behind the central "Glow". These three key-stones make up the final gflare. You can see them as three separate layers, where "Glow" is on top, "Rays" in the middle and "Secondary Flares" is at the bottom. In the "General" tab folder, you can set the opacity and mode, just like in ordinary layers (more info about Modes in chapter X).
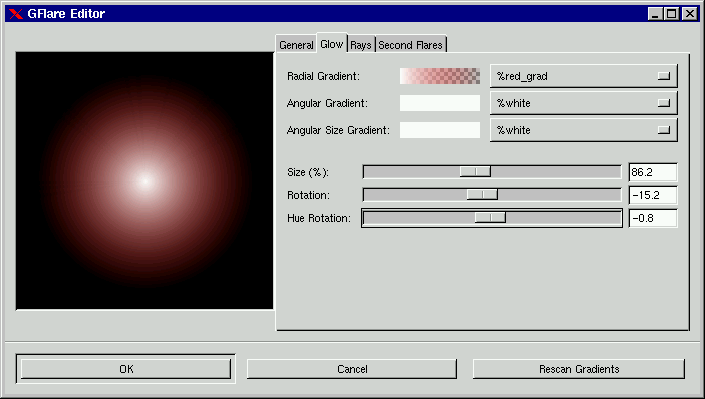
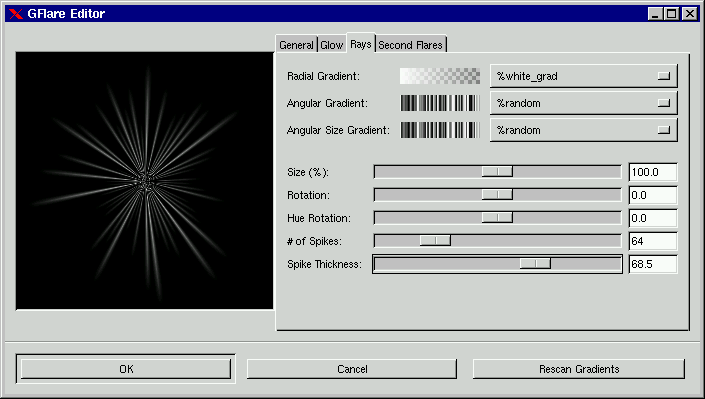
"Radial gradient" controls what color, shape and tone the glow will get from center to the edge.
The Radial and Angular gradients are multiplied (see Modes) and the result is the glow color.
The radius depends on the luminosity of the gradient. If the "color" is black, the radius is 0%, and if the "color" is white, the radius is 100%. So, if the gradient goes from white to black, the radius will diminish as you move. "Size" controls the size in %. "Rotation" controls where the Angular Size Gradient starts in deg. With "Hue Rotation" you can control the color of the whole glow. To understad the "HUE" color circle, read chapter X. Note, the gradients starting with a "%", are internal gradients for the editor, the rest comes from the gradient directories. You can add a gradient even when you're inside the editor. To do so, press "Rescan Gradients" to make it available.
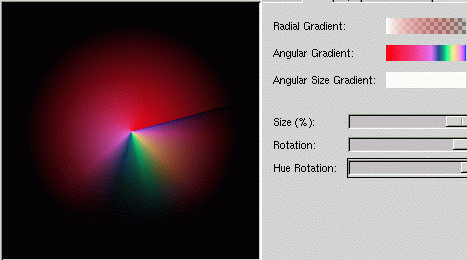
"# of Spikes" is a way to control how many spikes you want, but this is not the whole truth. Technically, it determines how dense or sparse the "spikeflower" will be. If you have a low value, it will look like you only have a few spikes and vice versa. "Spike Thickness" refers to how thick your spikes will be.
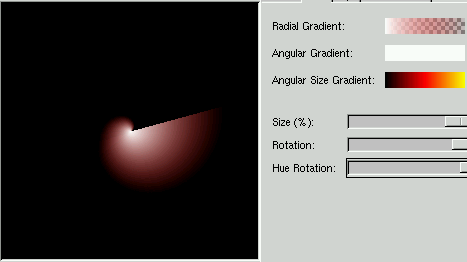
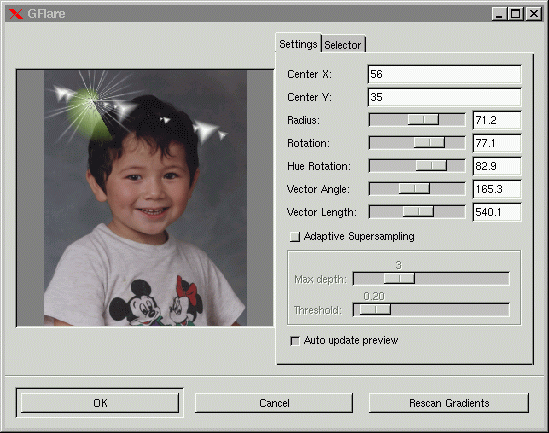
By the way, isn't it wonderful that you can create different gflare-patterns and then use them at the appropriate moment, just by choosing them in the "Selector" tab folder! You have to remember to have the path to where your gflare-patterns will be saved in your gimprc file, otherwise it will fail. (see appendix X) To place you Gflare, just press at the location you want to put it (in the preview window), just remember to have "Auto update preview" checked, otherwise you won't see what you are doing. (You can also type the coordinates in the X and Y fields). Radius controls how big your Gflare will be. Rotation is the angle of the Gflare, and it corresponds to the angle of the gflare key-stones. With "Hue Rotation" you can control the color of your Gflare. "Vector angle" controls the direction of your "Secondary flares" in deg. "Vector Length" controls the length of the "Secondary flares. For a explanation of "Adaptive Supersamling", see the Blend tool in chapter X. Basically it makes your gradients more smooth when they go from one color to another. Morph : see the Xmorph doc in appendix X.[Top] [Prev] [Next] [Bottom] karin@frozenriver.ale.se Copyright © 1997, Karin Kylander |
|||||||||||||||||
|
With any suggestions or questions please feel free to contact us | ||||||||||||||||||